STENCILING FURNITURE – FLORAL PLANT STAND
Hello, Ideal Stencils here with another stencilling project, and today we are going to be showing you an example of how you can use stencils to decorate any piece of furniture. I purchased this plant stand from a local shop which basically buys old furniture and paints it with Annie Sloan chalk paint to give it a fresh shabby chic look to resell. We are using our Dahlia stencil to finish it off with a floral finish. Stencil patterns can be used really successfully to add decoration to furniture at a low cost and with a few simple materials it is easy and quick to do.
Materials for our stencilling project:

For this project we used our Dahlia stencil, repositionable spray mount, a tester pot of light green emulsion paint, a plastic plate and stencil brush, also some kitchen roll (not shown) and a pair of scissors.
If you need to trim your stencil for your project then don’t be afraid to do so, just leave yourself with a border of at least 2cm of spare material around the design. We trimmed the stencils using the scissors as the stencil sheet was too large for the top and was bending over the edges.

We then sprayed the back of the stencil with a light misting of the spray mount so that that stencil would sit nice and flat to the surface of the plant stand and not move while we are stencilling. We then positioned it ready to paint.

Put some of the emulsion paint onto the plastic plate and swirl your brush into the paint so that the paint gets up into the bristles. Then before you put paint to stencil remember to off load the excess paint from the brush onto the kitchen roll. Too much paint causes paint to bleed under the stencil causing blotchy edges.

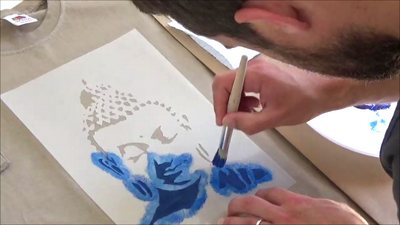
Here we are stippling the paint through the stencils cut out areas and transferring the design onto the top of the plant stand. Using a dry brush (by that we mean just very little paint on the brush) you can also swirl the paint in a circular motion through the stencil which tends to leave a smoother finish.

When the design was painted we lifted the stencil up to have a peek at the result. We thought that another coat would look great so we put the stencil back down and stippled/swirled another layer of paint.

That look great. As you can see from the close up I always like to leave the painted texture a little uneven so that some areas are painted more than others it just looks more visually interesting and really suited this shabby chic style of stencilling project.
I could have left it there but I was having so much fun that I wanted to carry on stencilling so I decided to stencil the bottom shelf as well.

And 5 minutes later the project was finished and I peeled the stencil of to reveal my new decorated and stencilled piece of furniture.

And there we have it. My plant stand that I use as more of a key and odd bits shelf in the hall has been given a new lease of life thanks to a stencil and a blob of paint. Stencilling is addictive, your stencil can be used over and over again so what’s next on the list?? Wherever there is a surface you can stencil it!! So have fun, be creative and get stencilling.
Have you stencilled any furniture pieces? what was it? And how did the project go? Let us know we would love to hear about your story!
Visit us at Ideal Stencils
Follow us on Facebook
or send us an email – info@idealstencils.co.uk


Leave a comment