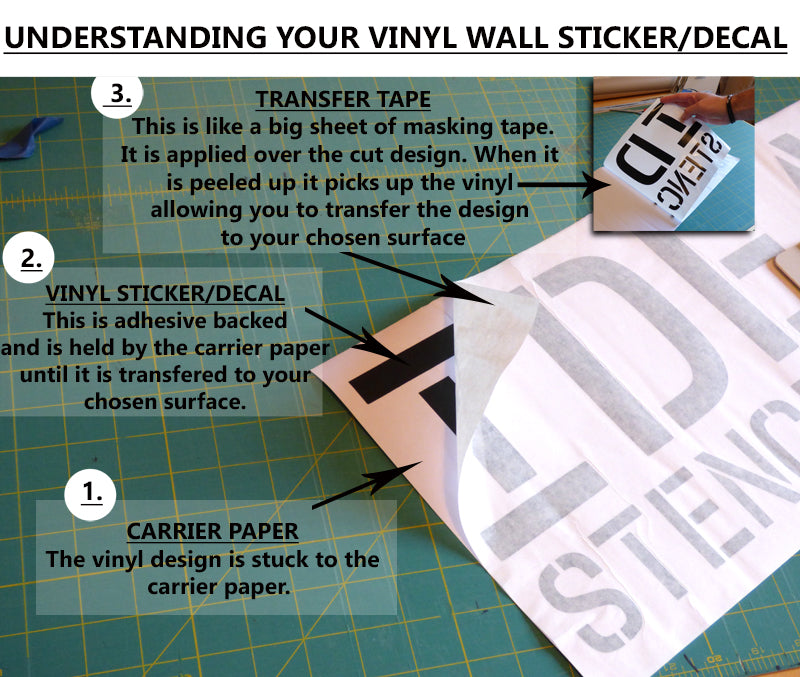
How to apply your vinyl wall sticker/decal
Hello, We recently have broadened our service to also offer custom vinyl wall stickers/graphics to customers. These are ideal for when you want some wording or imagery putting on a wall or any other smooth surface. They are designed for single use only and the films are available in many different colours and finishes. The graphic has a 3-5 year life and can be used for both internal and external use. It is simple to apply and peel off when you want to remove it.
This tutorial explains more about how the vinyl sticker is made and applied to your chosen surface.
HOW TO APPLY YOUR VINYL GRAPHIC
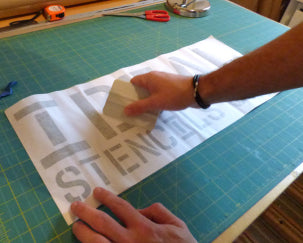
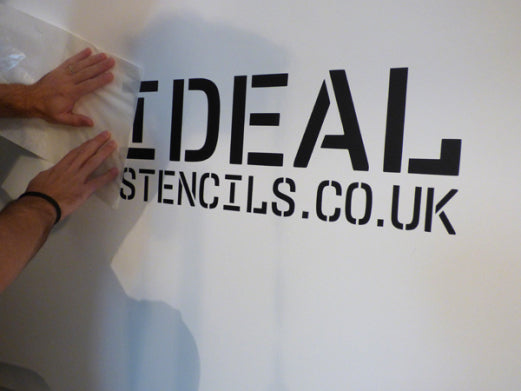
Step 1. – If your graphic came rolled up in a tube then you will want to smooth it out. Lay it out on a flat surface and rub over from the centre outwards using a squeegee or credit card. The transfer tape can be lifted up with the graphic and then rubbed back down to help this process (image above right)

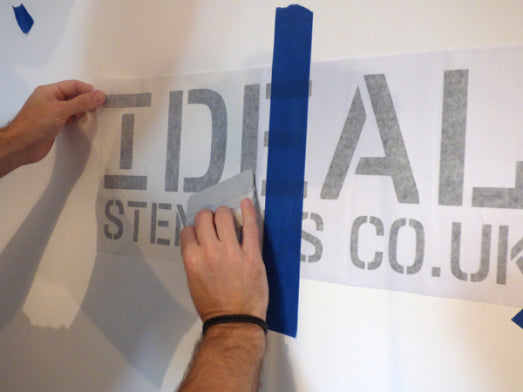
Step 2. – For larger designs tape up your graphic where you want it and apply a long strip of masking tape across the middle to create an anchor point, which allows the design to be applied in 2 parts. If the graphic is wider than it is high like this one put the tape vertically or if the design is higher than wide put the anchor tape horizontally. Small manageable stickers can simply be peeled off and applied by hand without the need for taping up.
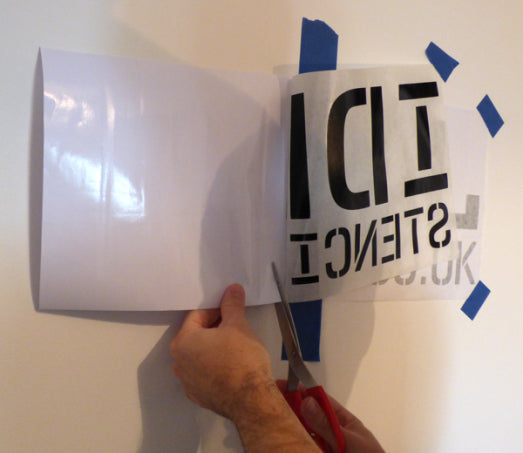
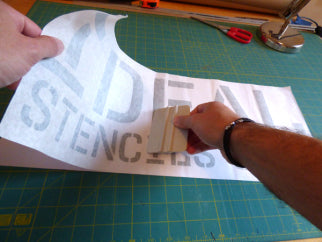
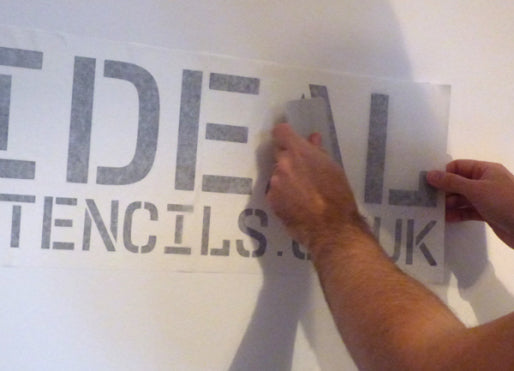
Step 3. – Slowly peel back the transfer tape and vinyl design. (If areas of the vinyl graphic stay on the contact sheet lay the transfer tape back down, rub over and try again) Cut off the contact sheet with scissors as close as you can to the anchor point.
Step 4. – Lay the transfer tape and graphic to the surface and rub over the vinyl from the anchor paint outwards to apply the sticker.
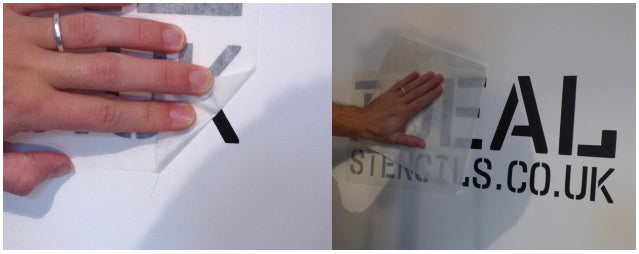
Step 5. – Remove the anchor tape and remaining carrier paper. Hold the edge of the graphic with one hand away from the wall and squeegee over the vinyl areas from the anchor point outwards to apply the rest of the design.
Step 6. – REMOVE THE TRANSFER TAPE
Peel back the corner of the transfer tape at a sharp angle making sure the vinyl is sticking to the wall. Continue to slowly peel back with a flat hand.
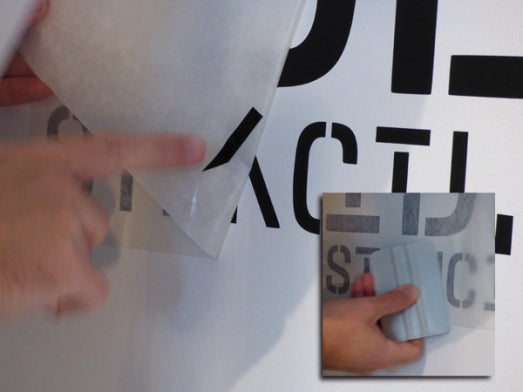
If part of the design stays stuck to the application tape (see above) then lay it back down and rub over that part of the design and try again.
Completely remove the transfer tape to reveal your great new vinyl wall graphic.
This guide covers all the bases for best practices and successful application of your sticker. Other methods can be used to simplify the process depending on your project and size of design.
Please download the pdf for this tutorial here –
How to apply your vinyl graphic
If you are interested in having a custom vinyl graphic cut of your logo or design then you can contact us at info@idealstencils.co.uk Just let us know the size you want the design and upload a design file and we can get back to you with a quote for it.
Visit us at Ideal Stencils
Follow us on Facebook

Leave a comment