PEACOCK FEATHER WALL PATTERN STENCILLING
Stencilling a feature wall is a great way to inject some colour and pattern and transform a room. The great thing about stencilling is that you can choose exactly the paint colour combinations of your choice. So you can be bright and bold or neutral and subtle. To some it may seem like an impossible task that is going to be laborious and take ages. Wrong. Home decor wall stencilling is fun and easy to do and when using a dense foam roller it doesn’t take as long as you would think. This feature wall took us about 2 hours to complete.

Ideal Stencils was recently given the task of stencilling a feature wall using our peacock feather motif stencil. It was decided that the motifs were to be painted in light grey on a white wall to create a light and subtle pattern. As the wall was fairly large we decided that we were going to use our A2 LARGE sized peacock stencil. (feather size 37 x 53cm approx)
Stencilling Materials
These materials are needed for most stencilling projects –
-Stencil
-Spraymount (repositionable)
-Low tack tape
-dense foam roller
-stencil brush
-polystyrene plate
-paint (emulsion paint)
-large sheet of paper to protect floor while using spraymount
-kitchen roll
-spirit level
Getting started
We recommend using spraymount (repositionable) . This way the stencil clings nice and closely to the wall reducing the risk of any paint bleeding under the stencil, which causes blotchy edges. Lay the stencil on the large piece of paper (so the floor doesn’t get tacky) and spray the back of the stencil with a thin misting and leave for 20 seconds until it becomes tacky.
When repeating a pattern using a single motif stencil we like to start in the top left corner. So we positioned our stencil, making sure it was level.
Put a little emulsion paint (you can choose what colour) onto the polystyrene plate and coat your roller evenly. Then offload it onto some kitchen paper to get rid of ALL the excess paint. The roller wants to feel damp, not wet and there should be no trace of paint build up at all.

No paint should be seen on the roller and it should feel damp not wet.
Paint your repeat pattern
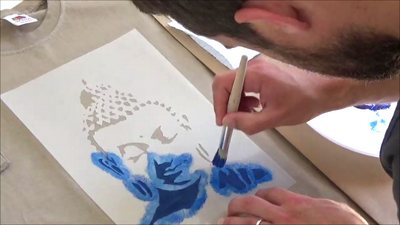
Paint over the stencil using a light/medium pressure to begin with and continue until the motif is painted, we find that for most designs with small/medium openings 1 layer is enough. You will need to reload and offload your roller many times through the project we needed to do it about once for every repeat. Please see our blog – HOW TO STENCIL WITH A ROLLER
When we had painted the stencil, we used pieces of low tack tape to make right angle crosses at the corners of the stencil so that we could align our next repeat along. We simply moved the same crosses of tape along with each repeat as we went. There are other methods to mark up your wall but this is one that we find works for us. You could if you were confident, place the stencil by eye, when a pattern is complete you don’t tend to notice minor misalignments.

We worked across the top of the wall using masking tape crosses to line up our repeats
Please see this video which shows you how to mark up a wall in this way to paint and repeat any motif stencil. https://www.youtube.com/embed/d0ZrH23RVmI
When we got to the end of the top row we moved down and positioned the peacock stencil so it was in between the two peacock feather motifs of the top row. This was to produce a staggered pattern as opposed to one that was just linear, up and down rows (depends on your preference) After checking that it was level we painted the motif in and moved across the wall painting the 2nd row positioning and aligning the stencils in the same way as before.

Position stencil in between the top row to do a staggered 2nd row
We continued in this way until all the feather repeats were painted, or at least all the ones that didn’t involve bending the stencil into corners as we left and tackled these areas last.
We could have left it as in the image below, the pattern on the wall still looks great. But for this tutorial and to create a more completed wallpaper look, we decided to finish off the design at the edges

Wall almost complete. Just not done the edge stencils.
Stencilling into the corners
Mask off along adjoining walls that you don’t want to get paint on. Bend and tape the stencil into the corner, this takes a little longer to do, but just take your time. You may want to leave one half of the stencil flapping free so you can really push it into the corner. Use the roller as much as you can and then use a stencil brush. I find it helps to use a metal rule to push the stencil into the corner whilst painting. The same methods are used if you need to stencil against a ceiling or skirting board.

The finished wall looks great, as I’m sure you will agree and all this with just one stencil and a bit of paint. Stencilling always gives a really natural finish to a wall that can’t be beaten. And once again the more you put in the more you get out, and the more enjoyment you get. So hopefully this tutorial has inspired you to do your own DIY stencil decorating project.

Please comment on this post below, let us know what you think OR let us know about your own stencilling projects. If you want to send us in your project photos, that would be brilliant, then we could feature them in a future blog, please email – info@idealstencils.co.uk


Leave a comment