PEACOCK FEATHER STENCILLED WALL ART
Welcome to the first blog from Ideal Stencils (we sell reusable stencils for home wall decor and art/craft) and in this blog we are going to be using our peacock feather stencil to quickly and easy produce a stunning piece of framed stencil wall art. You can purchase our peacock feather stencils at the following links-
- http://www.idealstencils.co.uk/peacock-feather-quill-wall-decor-stencil-2648-p.asp
- http://www.idealstencils.co.uk/peacock-feather-elegant-wall-decor-stencil-1-2665-p.asp

What materials will you need:
Paint- acrylic/emulsion work well
Stencil brush, other brushes
Kitchen Roll/Paper towels
Paper to paint on (we used newsprint paper)
Frame
3M Repositional spray mount
Carrying out the peacock feather stencil art project
The first thing that I did in preparation for this was to get a blank sheet of newsprint and paint it white using ordinary emulsion paint. Leaving some of the newsprint showing through to add texture. Once this was dried I laid it flat for a while under a rug to flatten it out as the wet paint makes it bumpy.
I wanted to create a stencil painting that would fit with our relaxing grey bedroom colour scheme so I chose to do a painting using monotone colours of grey and black. The black picture frame also was in keeping with this look I wanted to achieve.
Painting your stencil using a stencil brush
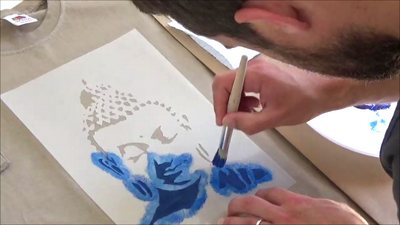
I sprayed the back of the stencil with a light mist of repositional spray mount to help keep the peacock feather stencil still as I painted. This isn’t completely necessary, I don’t mind a little bit of paint bleeding under the stencil, especially with the more worn, hand painted look I was going for. I positioned my peacock feather stencil to the right of the paper and loaded my brush with grey paint. The number one rule of stencilling is not to use too much paint, so I made sure I offloaded my brush onto some kitchen roll before I started painting. I stippled the paint all over the cut out areas of the stencil and reloaded and off loaded my brush with paint when necessary. I didn’t mind if I didn’t paint evenly some areas of the image, as I wasn’t going for perfection.


When I had peeled back the feather stencil I thought it looked a bit to dark – so to lighten it up a bit and to soften some of the edges I brushed over it lightly with some white paint using a normal decorators brush.

Repeating the peacock feather stencil
Then I decided that I was going to stencil another peacock feather to the left of the first but decided to stencil this the other way around. The paper started to become less flat as I painted so I had to hold some of the stencil bridges down with my fingers while painting.

When I had stencilled this image, and peeled off the stencil, I gave a quick brush over with the white paint as before to lighten up the stencilled image. I wanted these 2 grey peacock feathers to fade into the background as I painted on the last focal feather motif.
So next I put the border frame onto the paper and lined up the stencil for the final time making sure that everything with the composition was as I wanted it. And I painted the last stencil using black paint. There is no need to clean the stencil after every usage only when the build up of paint on it is compromising the resulting image.


After I had painted the last black stencil repeat, I was really happy with the results and couldn’t wait to get it in the frame. The actual painting of the peacock feather stencils took about half an hour to an hour and it was well worth it. I now have a really cool, monotone piece of hand painted peacock feather stencil art to admire.

I washed the stencil in warm soapy water and patted it dry and stored it away for the next project. Any of our stencils at Ideal Stencils can be used to create stunning wall art that you can hang whether it be on a canvas or to be displayed in a frame. It is just one of the many ways that stencils can be used to enhance your home decor. What ways have you used your stencils or what have you used them to decorate? Leave a comment and let us know!
If you want more tips and help on stencilling then please view out helpful how to stencil pages –
http://www.idealstencils.co.uk/how-to-stencil-9-c.asp
Visit us at Ideal Stencils
Follow us on Facebook
or send us an email – info@idealstencils.co.uk


Leave a comment