FLOCKING BIRDS PATTERN STENCILLING USING REGISTRATION MARKS
Hi! Ideal Stencils is on hand with another useful and informative stencil post. Pattern stencilling can be used to create a hand painted finish to any surface. Paint a feature wall in your home or use a pattern stencil for a host of other craft and decorative projects from fabric painting to furniture stencilling. We have a selection of repeat pattern stencils to choose from. Some are designed so that you can align repeats with previously painted areas and others like this flocking birds stencil have ‘registration marks’ cut into them to act as a guide to help create an allover pattern and this is what we will be showing you how to do today.

What are registration marks?
Registration marks are small circles normally cut into the corners of the stencils. They are used to help you map out an area by moving the stencil vertically and horizontally using the registration marks to create a grid of plotted reference points, allowing you to stencil/paint an allover repeated pattern with just one stencil.
STEP 1 – Place and mark your first stencil repeat

If your planning on painting a wall – use a spirit level to make sure your stencil is placed level and start high up on the wall, choosing an area where you have a free space from top to bottom (i.e no obstacle such as a radiator).
Position your stencil on your work area, using a light or water soluble pencil to mark the registration marks. I have drawn my pencil marks quite boldly to illustrate the process. If you don’t want to mark the surface then you can tear small strips of low tack tape off and place them on your work surface under where the registration marks are – these will then be taken off at the end of the project.
STEP 2 – plot out a vertical line of repeats

Remove the stencil and move it down lining up the top registration marks in the stencil with the bottom ones already drawn. In this way you can create a vertical row of repeats going all the way down your work area.
STEP 3 – move the stencil across and carry on mapping out vertical rows of repeats

When your vertical row is complete move the stencil over to the left or right align with the the previous registration markings. Then move down the work area vertically marking in your second row of repeats. Work in this way until the whole of your work area is mapped out.

For this tutorial we have used the registration marks to plot out 12 stencil repeats. You can keep going and do as many repeats as you like. If the points start not to match up perfectly, don’t worry they are only to act a guide and when the pattern is finished any small misalignments won’t be noticed. If you want to check the stencil is level again do so and adjust the stencil accordingly to keep things aligned.
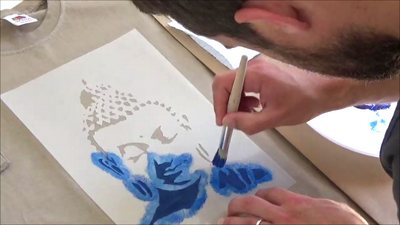
STEP 4 – Start painting your repeated pattern

When you have mapped out the whole of your work area you can start to paint your pattern. You can skip around to paint your repeats as you wish. You may want to do this if the stencil overlaps with areas where the paint is wet, emulsions and acrylics dry so fast though especially with a blast from a hair dryer on a warm setting.
Tips for painting you stencil
- If your painting a small stencil like this A5 XS Flocking Birds stencil you will want to use a stencil brush but for larger stencils you may want to use a dense foam roller to complete your project. If so please see our how to stencil using a roller blog.
- You can adhere your stencil to your surface with repositionable spray mount which gives you a nice close contact with your surface or you can use pieces of low tack tape.
- The golden rule of stencilling is always DO NOT USE TO MUCH PAINT. Make sure that you have some kitchen roll at hand and once you have applied paint to your brush or roller offload off onto the kitchen roll. Stencilling requires a roller or brush that is not too wet as too much paint will cause paint to be pushed under the stencils edges causing blotchy results.
- Stencils can be bent into corners at the ceiling/picture rail, down at the skirting board, or where one wall meets another. Just mask of areas that you don’t want to get paint on using low tack decorators tape.
Have fun watching your pattern take shape in front of your eyes. Be inspired by colour and choose paint colours for your project that represent what you want to achieve. Stencils are great because they put you in control of being creative and when you have finished your project you will feel satisfied that you have invested your time in creating something unique to you.
Thanks for reading and hope that you can take this knowledge to use in your future stencilling!
What do you think? Have you ever painted a repeat pattern using a stencil? If so let us know about it!
Visit us at Ideal Stencils
Follow us on Facebook
or send us an email – info@idealstencils.co.uk


Leave a comment