Vintage Floral Wallpaper Stenciling
Hi, If you find this blog - welcome to our story on how we stenciled this wonderful vintage floral pattern on our daughters bedroom wall - This wall pattern is ideal for an older Kids room decor and we had recently moved to the country and so a floral theme seemed fitting.
We also wanted to use one of our more complex stencils to test out, and ensure that it aligned perfectly over the wall area. We also tested out some different painting methods - with stenciling extra details in the middles of the flowers to create a pattern design with more dimension.
Anyway enough of me yakking on - lets get to it and hopefully you will learn something for your wall painting project.

Here is the materials we used - dense foam roller, Axus brand are good - proper stencil brushes and some small tester pots of paint from crown paints local shop.


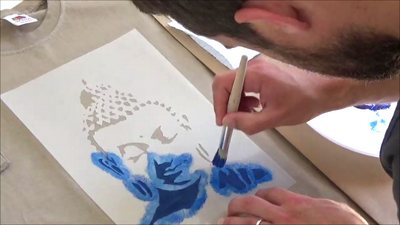
This image shows Michaela using a stencil brush and some light pink paint to add pink into the middles of the flowers, you just need to use a smidgen of paint on the brush, to lightly blush a small amount of pink - that's all it takes. These little design additions really can make your project super personal and unique!

Corners and edging parts you leave until last - you do need a bit of patience to align the stencil, tape and brush in position. This slanted corner was particularly awkward, but with some perseverance we managed it.

We got to the last strip of wall to the left of the door and found it would be much easier to trim the stencil - it is common to cut up your stencil to finish off the last awkward areas and so we did, just ensure that your stencil can take being cut up and that it will remain in tacked and not fall apart ( this depends on the design)
A Couple of afternoons work and we produced a unique wall painted pattern which we were super pleased with and as you can see from the photos of 'before' and 'after' we made a massive difference to the space - making it look much more personal and warm.


Laissez un commentaire