

Giraffe Print Stencil
1Precio habitual £9.99

Most items are dispatched next working day.
If UK items have not arrived by 15 working days (Excluding Sundays and Bank Holidays) of the dispatch date then please let us know and we will be happy to assist.
Most orders will be delivered to Europe in 2 weeks from dispatch.
Please allow 6 weeks for delivery (Excluding Sundays and Bank Holidays) of the dispatch date then please let us know and we will be happy to assist.
Most orders will be delivered to Rest of the World destinations around 2-3 weeks from dispatch
Please allow 6 weeks for delivery (Excluding Sundays and Bank Holidays) of the dispatch date then please let us know and we will be happy to assist.
We are a UK based business and it is the responsibility of the purchaser to pay any import tax that is due on items ordered.
Stenciling is really fun and simple and you can add amazing effects to 100's of home decorating projects.
1 - Position your stencil: Use low tack tape or repositionable spray mount to keep your stencil in place
2 - Paint your stencil: Depending on your project or preferences you can use a stencil brush, dense foam roller, or spray paint to paint your stencil
3 - Repeat your stencil: Repeat your pattern or motif over and over again. When you have finished, water based paints can be soaked/washed off the stencil and then stored away safe for future use
Top tip: Don't us too much paint! This will cause paint to seep under the stencil and cause blotchy edges.
Our stencils are also suitable for many other uses as varied as cake decorating, embossing and relief stenciling with plaster.
See our HOW TO section and BLOG for further stenciling information.
Hand-drawn Polka Dots Spots Wall Stencil
Precio habitual £25.99

Most items are dispatched next working day.
If UK items have not arrived by 15 working days (Excluding Sundays and Bank Holidays) of the dispatch date then please let us know and we will be happy to assist.
Most orders will be delivered to Europe in 2 weeks from dispatch.
Please allow 6 weeks for delivery (Excluding Sundays and Bank Holidays) of the dispatch date then please let us know and we will be happy to assist.
Most orders will be delivered to Rest of the World destinations around 2-3 weeks from dispatch
Please allow 6 weeks for delivery (Excluding Sundays and Bank Holidays) of the dispatch date then please let us know and we will be happy to assist.
We are a UK based business and it is the responsibility of the purchaser to pay any import tax that is due on items ordered.
Stenciling is really fun and simple and you can add amazing effects to 100's of home decorating projects.
1 - Position your stencil: Use low tack tape or repositionable spray mount to keep your stencil in place
2 - Paint your stencil: Depending on your project or preferences you can use a stencil brush, dense foam roller, or spray paint to paint your stencil
3 - Repeat your stencil: Repeat your pattern or motif over and over again. When you have finished, water based paints can be soaked/washed off the stencil and then stored away safe for future use
Top tip: Don't us too much paint! This will cause paint to seep under the stencil and cause blotchy edges.
Our stencils are also suitable for many other uses as varied as cake decorating, embossing and relief stenciling with plaster.
See our HOW TO section and BLOG for further stenciling information.
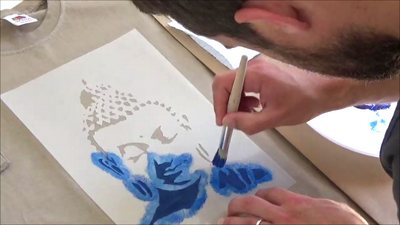
View our guides to help you create the perfect stencils with a range of tools on a selection of materials

Our bespoke service means your designs can be cut as stencils that you can use to paint/mark on any surface.