Top Stencilling FAQ’S – How to stencil tips and hints
Hello, Welcome to our new blog from Ideal Stencils
So you want to know the basics of stencilling and not sure what it’s all about or you have got your first stencil and you want to know what materials you need and how to go about your project to get the best results. This blog puts alot of helpful info in one place and will guide you through your journey into stencilling and give you all the hints and tips you will need to know.
What is a stencil?
A stencil is a sheet of material in which a design has been cut out. Pigment is applied through the cut out areas to transfer the design onto your chosen surface. Stencils are designed as a tool to repeat the same motif/design over and over again.
What are stencils made from?
Our stencils are made from a thin plastic like material called Mylar. It is very popular materiel for stencils. All our home decor and craft stencils are made from 125 micron Mylar. This material is transparent and thin (great for bending into corners or round objects) but very resuable and great for use with all paint types inc spray paint. We also do other grades such as 190, 250 and 350 micron sheets. One mm = 1000 microns.

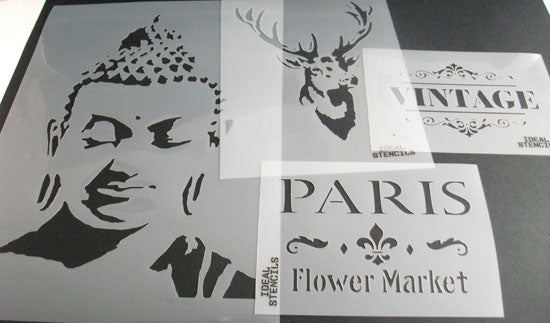
What can I use my stencil for?
Use your stencil for decorating any surface. We offer alot of home decor stencils which are used for painting onto walls. So you can paint your own border or wallpaper effect, or larger stencils can be used as a single motif. Smaller stencils can be used for any other decorative or craft use. You can paint any fabrics, so T-shirts, cushions, table clothes, aprons, lamp shades, also any other surface you can think of.
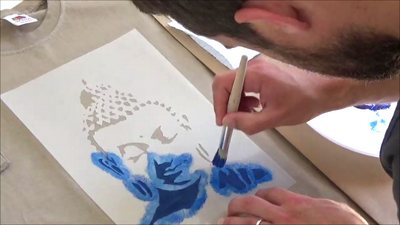
What is the best way to paint my stencil. Brush, roller, sponge, spray paint?
It depends on your project. A dense foam roller is great for larger projects such as painting a feature stencilled wall as it covers the area quickly and leaves a nice smooth result. Brushes are great for smaller projects or for blending colours or shading for more detailed stencilling. Sponges can be used to paint your stencil and is an alternative to brushes, a sponge area is larger than a brush so the application of paint is quicker. Spray paints are great for a certain look with your stencil, they are quick to use and can create great effects, but are best for outside or well ventilated use.

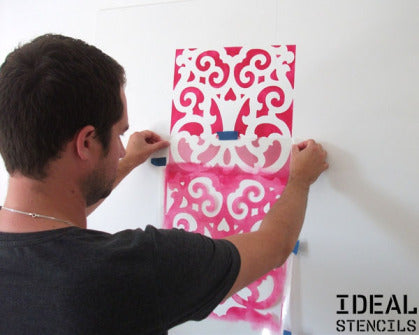
How do I fix my stencil in position?
We are great fans of repositionable spray mount when it comes to fixing stencils in place. The 3M brand is highly recommended as it doesn’t leave a residue on the surface your painting. Basically you spray a light misting on the back of the stencil (put stencil onto some scrap paper so you don’t make your home surfaces sticky) and it makes it tacky enough to hold to the surface while you paint, but allows you to peel it off afterwards. We also would recommend using pieces of low tack blue decorators tape if your stencil is large or you are fixing it in an awkward position.
When do I need to clean my stencil?
You only really need to clean your stencil when the build up of paint is effecting your results or the use of the stencil. So you don’t need to clean it after every use. Water based paints are easily soaked off in warm soapy water.
Top tip for best stencilling results.
- Use repositionable spray mount on the back of the stencil as it holds the stencil close to the surface.
- DO NOT USE ALOT OF PAINT!! This is the golden rule. If you blob the paint onto the stencil guess what’s going to happen? Paint will bleed under the stencil and when you peel it off the edges will be blotchy. You have only yourself to blame! Apply a little paint to you brush, or roller or sponge and then dab it/roll it off onto some paper towel to get rid of the excess. Only then start painting. You will learn as you go along the right amount of paint needed to get great results. You can always reload your tool with more paint, which is better than ruining your project by trying to rush it by using too much paint.
- You can always lift up the stencil at the edge to see what kind of result you are getting.
- If you get any paint on a wipe-able surface like a wall then baby wipes are great for wiping it off with out leaving a mark.
- You may need to paint more than one layer depending on the type of paint and result you want to achieve.
These tutorials are going to be very helpful to you:
How to stencil using a stencil brush – https://idealstencilsblog.com/2015/05/16/how-to-use-a-stencil-brush/
How to stencil with a roller – https://idealstencilsblog.com/2015/06/06/how-to-stencil-using-a-roller/
How to stencil with spray paint – https://idealstencilsblog.com/2015/06/11/spray-paint-a-banksy-stencil/
How to clean your stencil – https://idealstencilsblog.com/2015/07/15/how-to-clean-your-stencil/
How to care for your stencil – http://www.idealstencils.co.uk/care-for-your-stencils-15-c.asp
This list tells you what materials you will need. Depending on your stencilling project you may not need all these things –
- Stencil brushes in a variety of sizes
- Dense foam roller ( good quality) also called gloss rollers
- Paints – acrylics and emulsions work great – obviously use the paint suitable for your project
- Kitchen roll – for blotting excess paint of your brush/roller ets
- Polystyrene plate – for putting paint on – washable and reusable
- Repositional spray mount – 3M brand recommended comes in 200 and 400ml
- Blue painters tape – low tack and ideal for holding stencils in place
- Fine brush – this is good for touching up areas, say bridges in lettering or parts of an all over pattern that may have some edge bleed etc
- Spirit level – for making sure that stencils are level especially when doing repeat pattern allover patterns.
- Spare scrap paper – for masking off around stencil, practising on, or putting down when spraying spray mount
We also have some video tutorials at this link – http://www.idealstencils.co.uk/how-to-stencil-video-tutorials-26-c.asp
We are sure that you will get great results if you follow our guides. Stencilling is a fun and creative way to bring your project to life and the results can be unique and beautiful. Happy stencilling.
Please leave a comment below and subscribe over on the right side of the blog.
visit our shop at – http://www.idealstencils.co.uk/
email us at – info@idealstencils.co.uk
Dejar un comentario